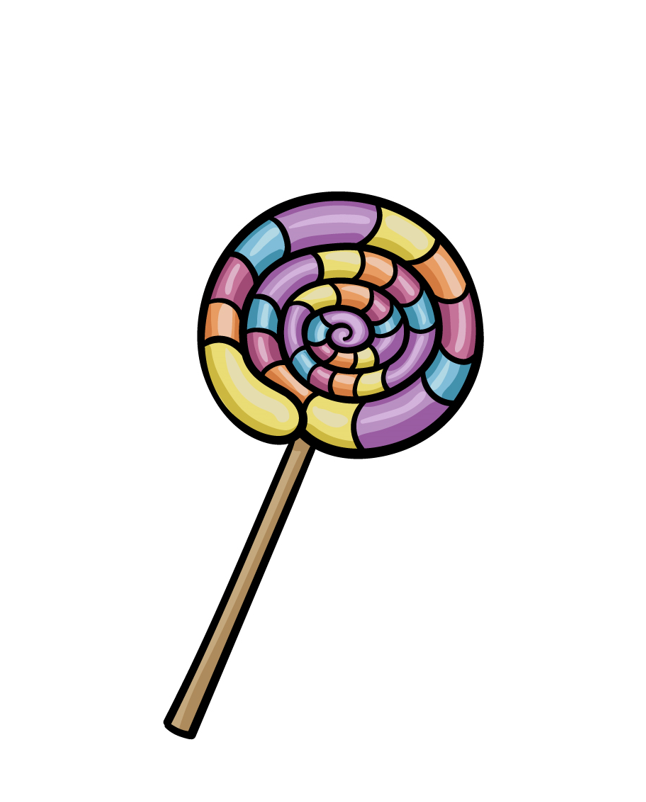
There are numerous delectable treats, and candies are probably the most delicious you can have! These treats can arrive in a practically unending measure of varieties, designs, and flavours. If you have a slight sweet tooth, there’s a candy to appreciate. The exemplary candy structure is a twirl shape, although it looks fabulous. You were figuring out how to attract a candy this structure can challenge. You can relax, however, because you’re on the correct manual for perceiving how it’s finished! We genuinely want to believe that you partake in this bit-by-bit guide on the most proficient method to attract a candy in 6 stages! If you are looking for drawing ideas, cool drawings, drawing for kids, cartoon drawings, flower drawings, and animal drawings, then you are at the right place; here, you will get all these drawings.
Stage 1:
We’ll begin with the candy layout in this initial step of our aid on the most proficient method to draw a candy! As referenced, this candy will have a surprising shape. It won’t be a perfect circle, and the line will move internally close to the lower part of the candy frame. Pacifier in the accompanying advances. This all could sound a piece convoluted. However, it’s simpler than it looks! Follow the reference picture to guarantee you don’t get lost as you draw.
Stage2:
Candy would be tacky and terrible to eat without a stick to hold, so we’ll attract one to this step of your candy drawing. This ought to be a simple task; you’ll make it more straightforward if you utilize a ruler to help you. Define two straight boundaries near one another from the body of the pacifier. The stick will come near where the line moved internally on the nipple in the initial step. You can wrap up by interfacing these lines with a short level line at the base. That is all there is to it; how about we go to stage 3?
Stage 3: Presently, begin drawing the candy twirl.
We began drawing the candy twirl in the initial step of this aide on the most proficient method to draw a candy, and in this step, we will be propelled by it. You will currently start to see the reason for the line you attract the candy frame as you go on with this line for the twirl. Define an internal bent boundary in the pacifier beginning with this line entering the pacifier. Then follow the presence of the bent line in our reference picture to draw this whirling line…
Stage 4:
We will proceed with the twirl design in this piece of your candy plan. Keep the line you began in the past step as it curves further into the candy. There will be a little space left in the focal point of this plan toward the finish of this step. However, we will fill it in for certain last enriching subtleties in the following stage.
Stage 5:
As referenced in the past step of this aide on the best way to draw a candy, we will complete the whirl example and add a few last subtleties in this part. After finishing that thrilling line, now is the right time to improve your candy! Here you can pick an alternate plan from our own on the off chance that you like it, yet for our own, we will add a few little bent lines through the different twirls of the pacifier design. This will make a few segments inside the candy and give you numerous choices to give it numerous unique tones later. Once you’ve completed this candy’s last subtleties, you can continue toward the last stage. Before doing as such, you can likewise add your subtleties! These can incorporate tomfoolery subtleties like an indentation in the candy, or you can draw a foundation showing what different confections you’d like with that candy. Try not to tell your dental specialist! How can you go to complete this drawing before the last step?
Stage 6:
Presently comes the piece of this guide that is maybe the best time! You can wrap up with exceptional varieties in this piece of your candy drawing. We told you the best way to variety this picture in our reference picture. However, it’s just an idea. This is a magnificent chance to utilize all your number one splendid and lovely tones to polish it off! If you’ve decided on our plan, you’ll have a lot of segments to variety in to make a beautiful shelter. We can hardly stand by to see what tones, designs and staggering.


Leave a Comment
You must be logged in to post a comment.